Happy Fall and Halloween Everyone! I thought I would show everyone a few of the crafts that Finn and I have made for fall and Halloween. All of these crafts are made from almost exclusively items that we got at The Dollar Tree.
The first one we did, was these cute little wine cork pumpkins. I did actually get the corks on Amazon, a bag of 50 for various crafts. I probably had enough but I wanted to be sure! These were so easy to do. I had Finn help me with the painting, which I got at the Dollar Tree. He dipped the ends in some paint and stamped them on a paper to take the excess off, which he obviously loved.
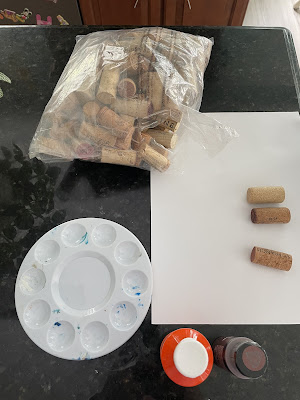
Some of the corks had wine stains on the ends and some were just plain cork, and I wanted to utilize this. I tried to randomly place the corks in pumpkin shape. I did lines of 4-5-6-5-4 on the first pumpkin I did, and did the second one smaller, but you could make them as big or as small as you want. I then used my glue gun to glue them all together.

I took some leaves off some Dollar Tree picks for the top, and I used the little cut logs and ribbon from DT as well. You could use a cork instead, or anything else you would like but I liked the size difference. Again, I just glued everything on and tied the ribbon around. I'm terrible at ribbons and will likely redo these. These turned out so cute though!
I still have lots of corks left, so stay tuned for some Christmas Santas and snowmen.
Next we have a cute little centerpiece. I got the ribbon, styrofoam ring, leaves, acorns and flowers at Dollar Tree, and the glass pumpkin I used was a hot seller in Bullseye's Playground at Target this year. You could use a different kind of fake pumpkin or even a real pumpkin.
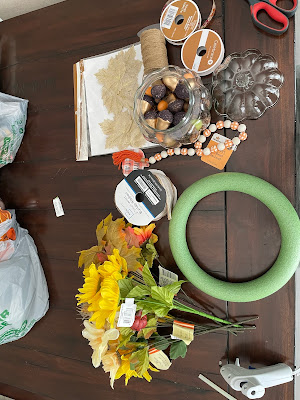
I wrapped the burlap ribbon around the ring and secured it with some hot glue. Then I had Finn help me pull some of the flowers off the picks. I chose mostly sunflowers for this project, but use whatever you like.
I put the acorns in the pumpkin and use some tiny pine cones that I picked up in Maine last fall as well.
I then clued down some of the burlap and gold leaves and put the flowers on top. I wrapped some cord around the top of the pumpkin and glued it in place too. and Ta Da! a super cute Fall centerpiece. Idea credit to Krafts by Kaitlyn on Youtube.
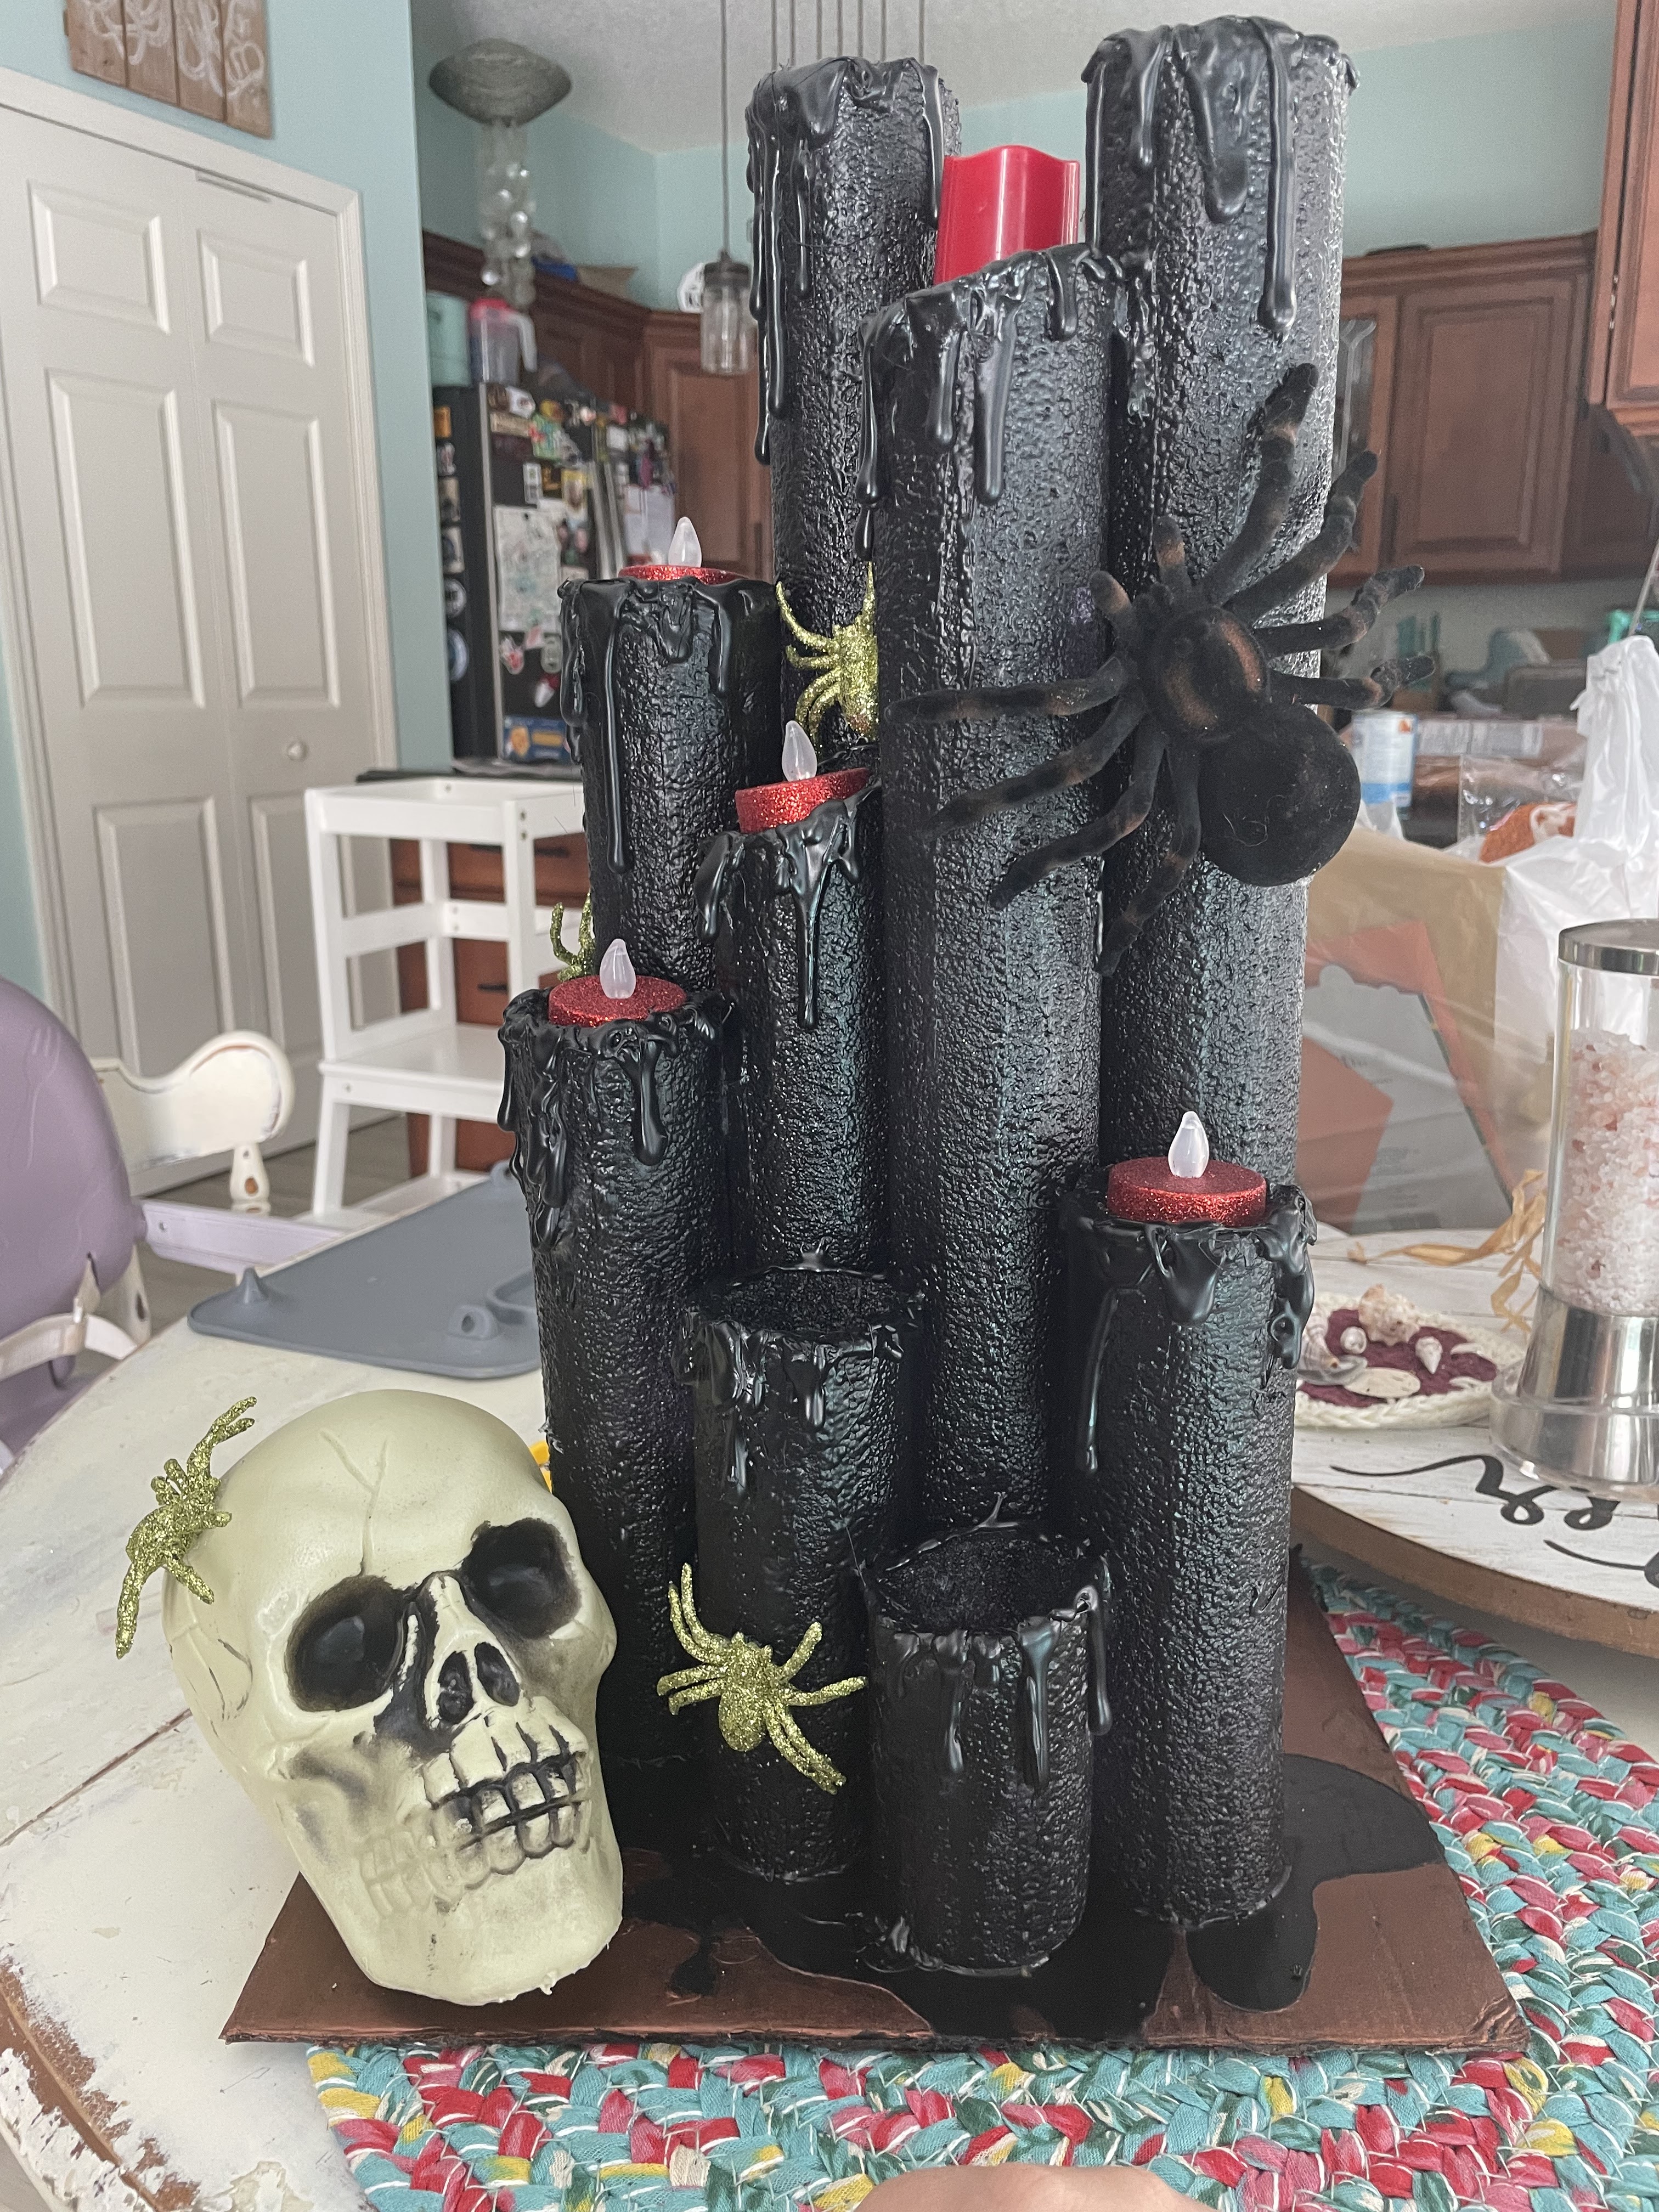
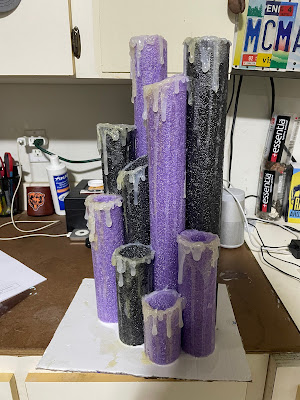
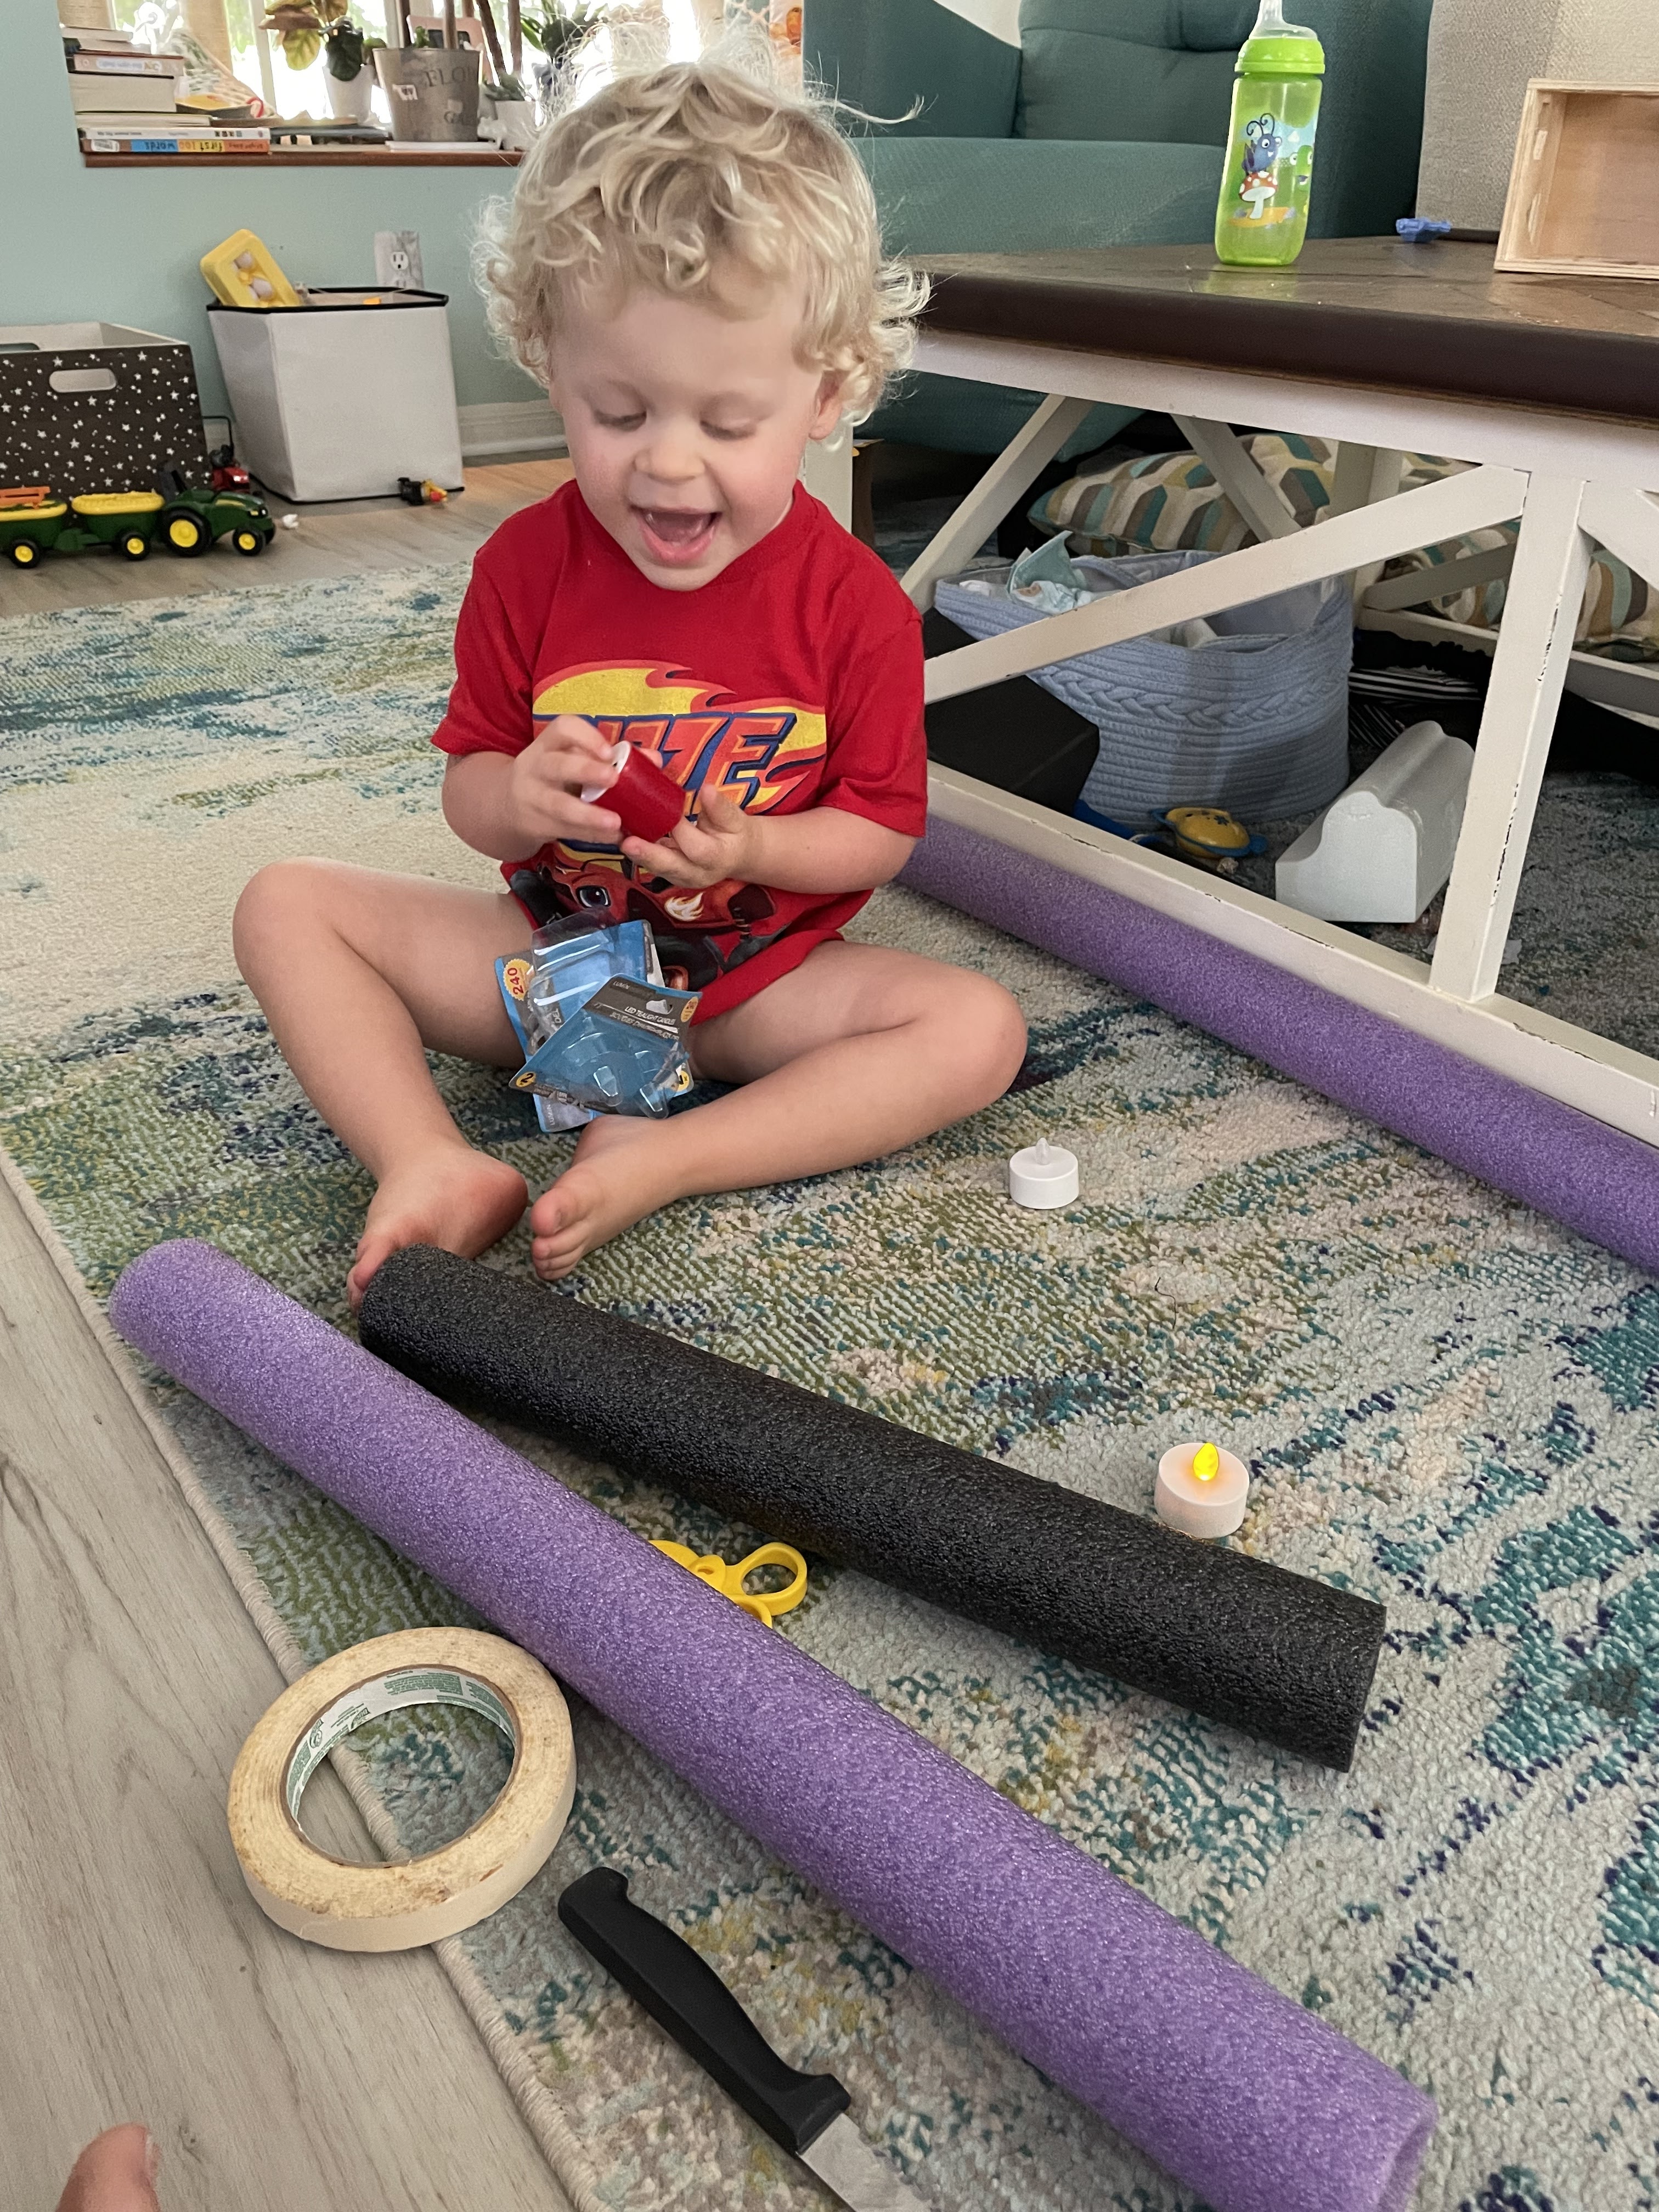
The next one, our halloween craft, was the most fun, but the most learning curve as well. Again, everything for this was from Dollar Tree, until we got to the glue part, but I'll go into that more later. I used DT pool noodles and cut them in to different lengths (tip: they cut really easily with a steak/serrated knife). Finn helped by using them as swords, and quality control on the little battery candles.
I taped them together how I wanted them arranged then used my hot glue gun to glue them in place.
Now was the part that took some experimenting. I started off thinking I would be able to just use white glue. I used ab out a whole regular size container of the glue, and when I first did it, it looked great. I came back a couple hours later and the glue had completely melted off into a pool all over Josh's work bench. So, I was back to the drawing board. I initially though that my glue gun would work but I didn't think I wanted to waste all my glue sticks. So I had josh did out some rubber cement. It work, but not great, so I did a couple base layers of that and ended up using a ton of hot glue, but it worked great. Once it was all dry, I spray painted it with a matte black spray paint. One coat worked well.
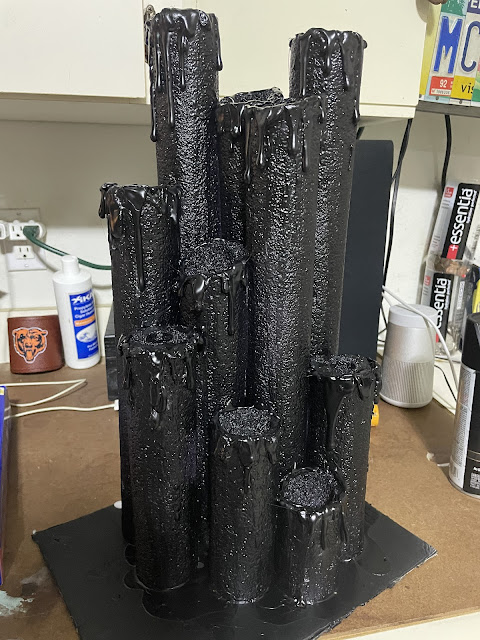
Once that was all dry, Finn and I got to work decorating and getting the lights in. I had some white lights and some sparkly red ones. I ended up spray painting the white ones black and left the red ones. all of these lights are from the DT as well as the sparkly spiders, tarantula and the skull.
The finished product, I absolutely love it! It will be going on our candy table at Halloween.


